WhatsApp Cloud API is the cloud-based version of the company’s developer tool WhatsApp Business API.
The new tool, as per the company, aims to make it easier for businesses of all sizes anywhere in the world to get started on WhatsApp.
“In just a few minutes, any business or developer can easily access our service, build directly on top of WhatsApp to customize their experience and speed up their response time to customers by using our secure WhatsApp Cloud API hosted by Meta.
The Cloud API allows you to implement WhatsApp Business APIs without the cost of hosting of your own servers and also allows you to scale your business messaging.
Complete WhatsApp Cloud API Setup Video Tutorial
Following are the setups to get onboarded to WhatsApp cloud API.
Step 1:
Search Meta for Developers on google.

Step 2:
Click on the Login in option from the meta for developers page, where you need to log in with your Facebook account.

Step 3:
Once login is done, click on Get Started option.
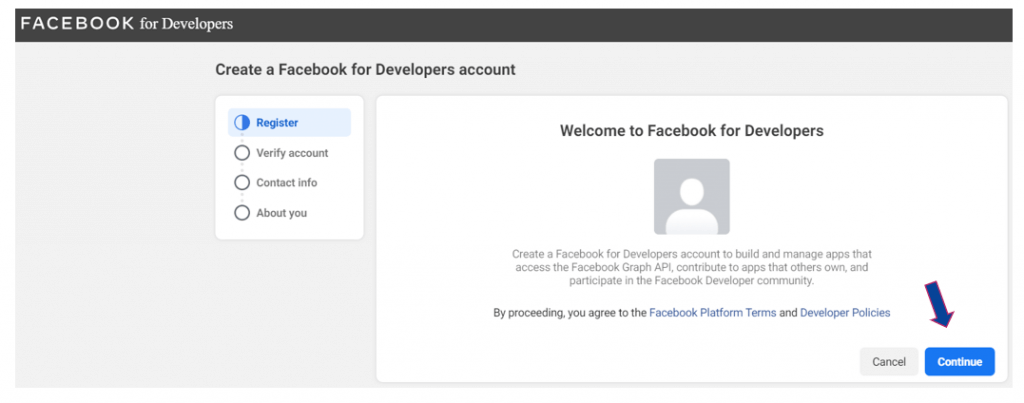
Step 4:
You need to create a Facebook for developers account. Click on the continue button to get started.
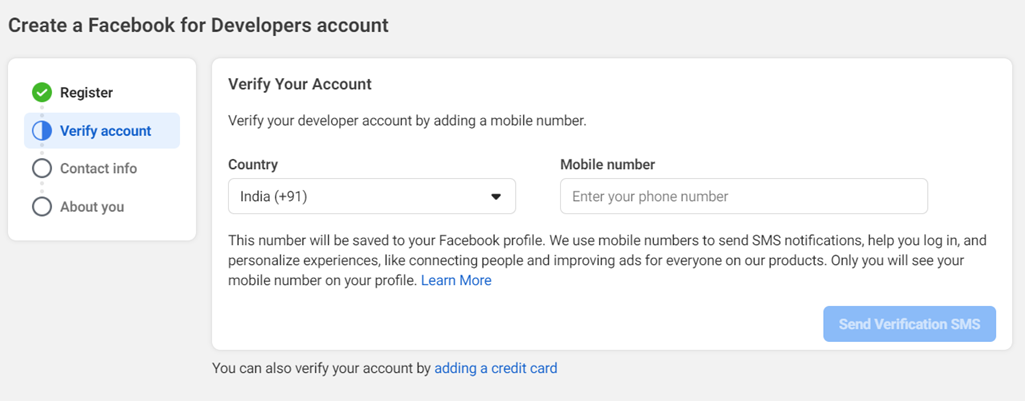
Step 5:
Complete the account verification either through phone number or email.
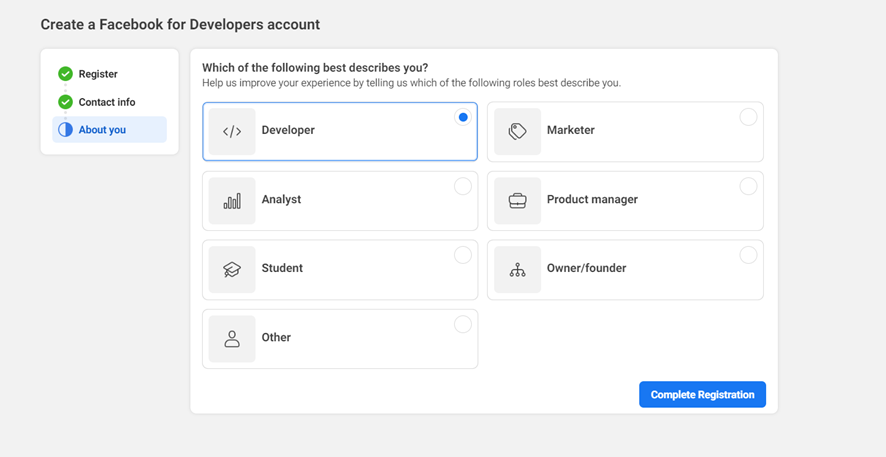
Step 6:
Select the most appropriate option which describes you.
Step 7:
Click on Create App option to create a developer app.

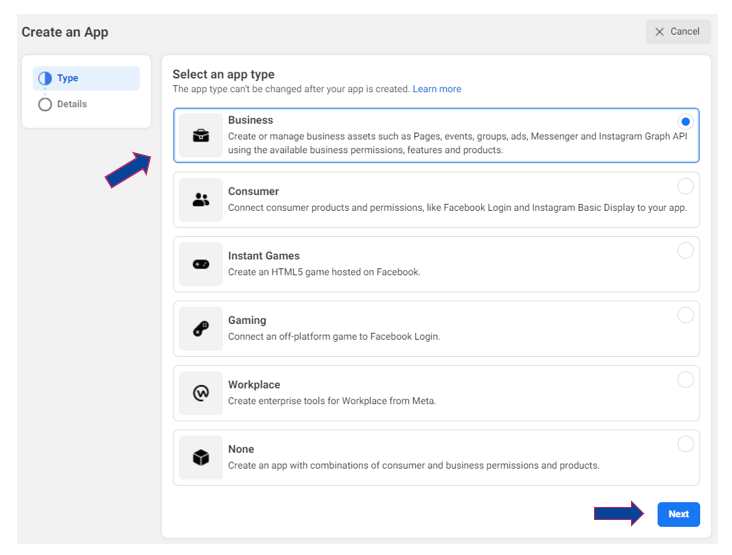
Step 8:
Click on the Business option from the list and click Next.
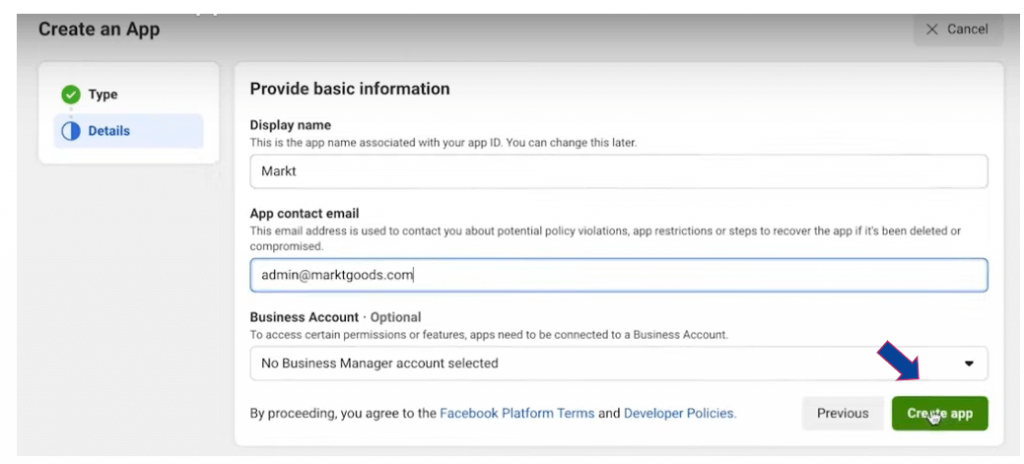
Step 9:
Fill all the basic details and click Create app.
Step 10:
From the list of different products, select WhatsApp.
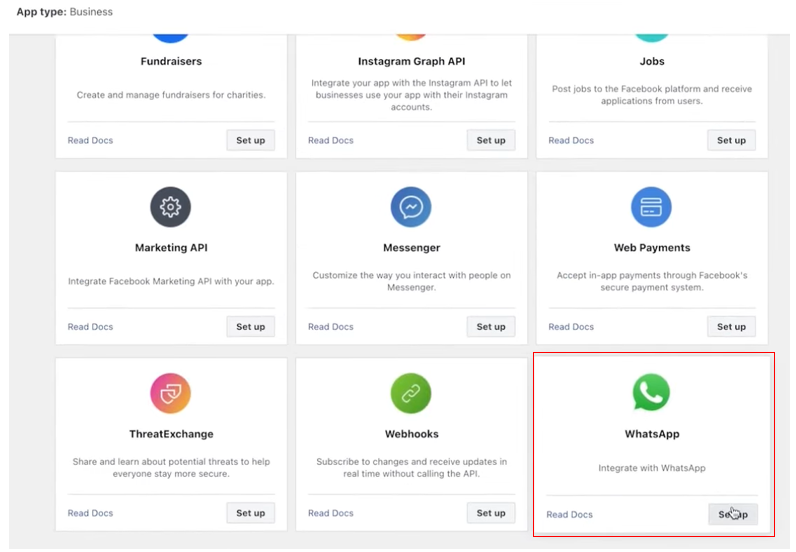
Step 11:
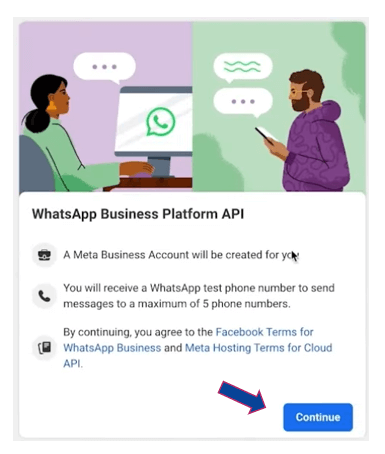
Click Continue to complete the setup.
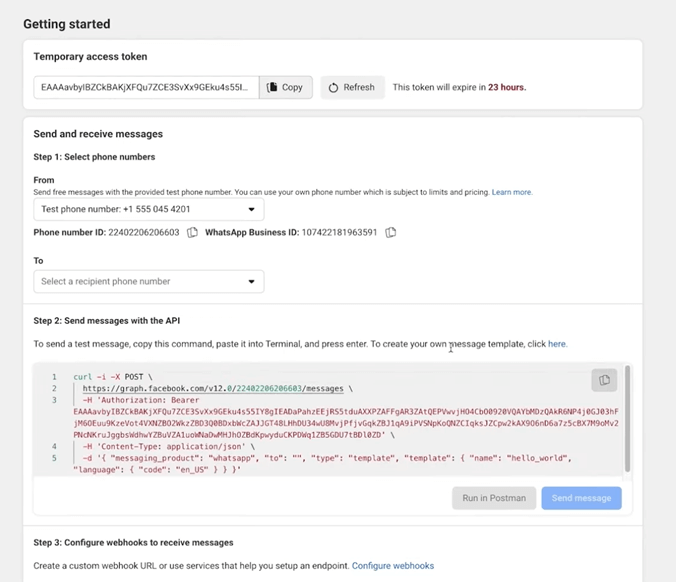
Step 12:
Here you can start testing the cloud API with a testing number that is provided by Facebook.
You can add up to 5 contacts to test the message.
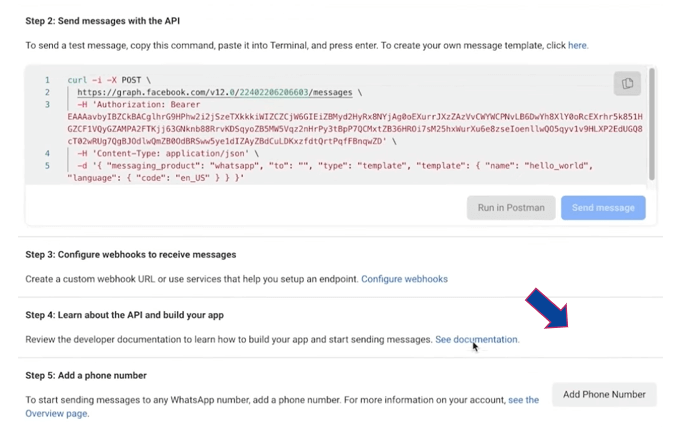
Step 13:
Once testing gets done, you can add your own number to send messages by clicking Add Phone Number.
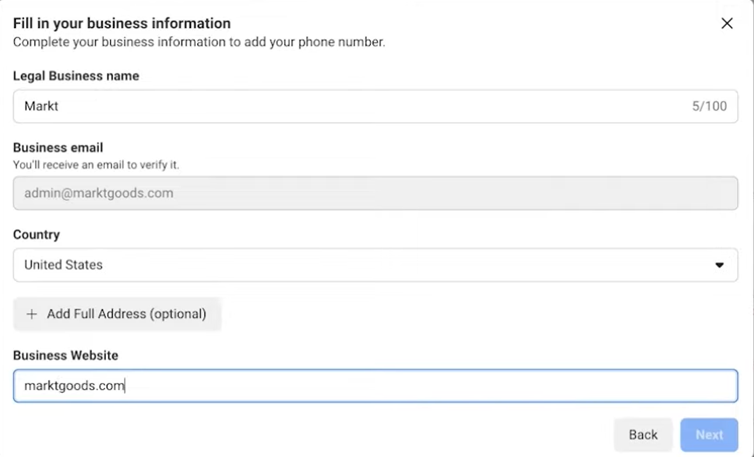
Step 14:
Fill in all your business details and click Next
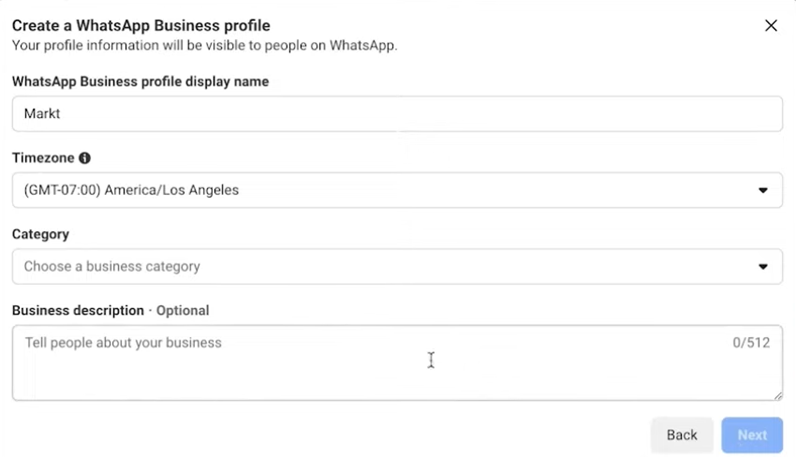
Step 15:
Select a business category and other information and click Next.
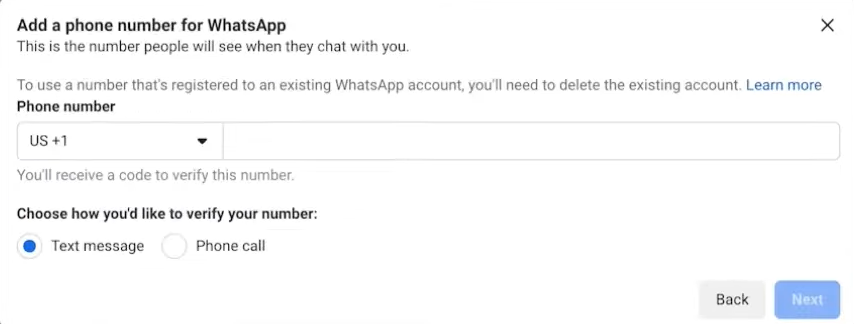
Step 16:
Here enter the number which you want to register with cloud API and click Next.
Step 17:
Once the number verification is done, your registered API number will get displayed under the form number section. Kudos!! Now you can start using your number and send messages.
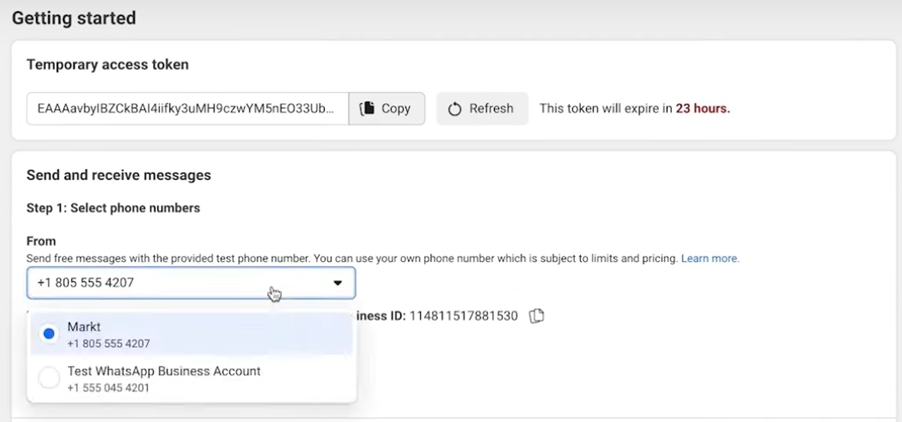
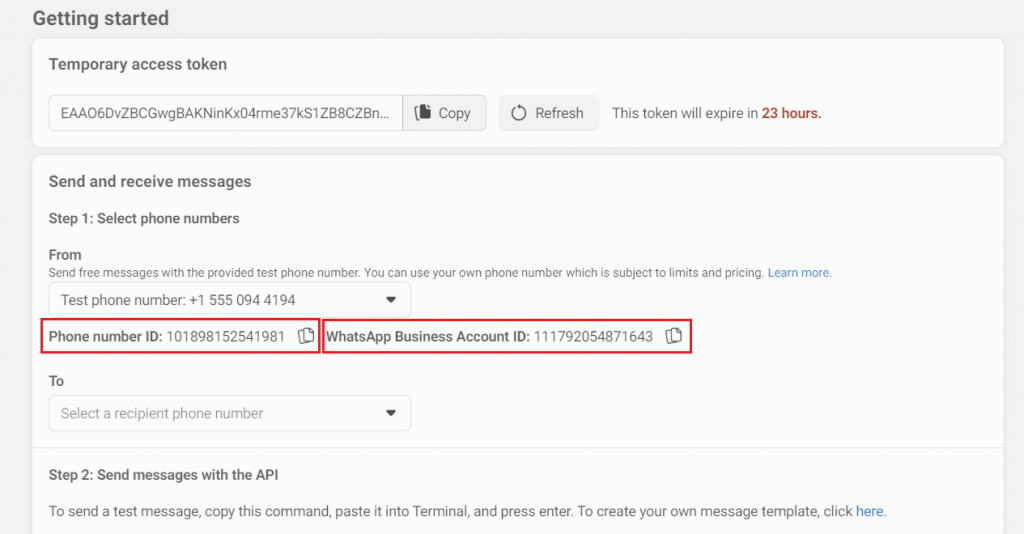
Step 18:
Now, the Phone number ID and WhatsApp Business Account ID are ready to use.